Key Elements to Perfect Your Laminated Dough for Pastries
How to Choose the Right Flour for Exceptional Pastry Results
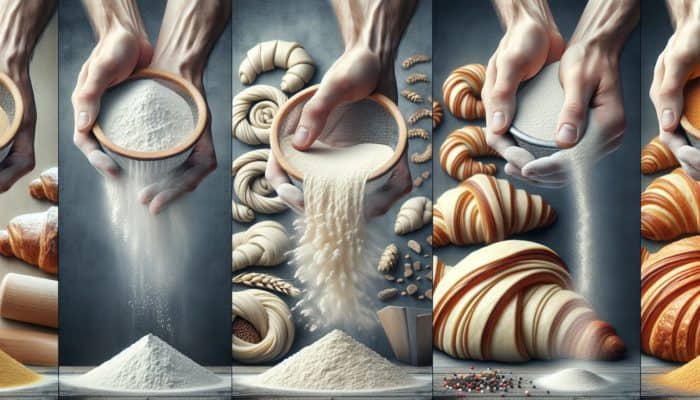
Understanding the process of creating laminated dough for pastries is essential, and selecting the appropriate flour is a critical first step in this culinary journey. The flour you choose can significantly influence the elasticity and overall texture of your dough. Generally, both all-purpose flour and bread flour are recommended due to their elevated protein content, which is vital for forming gluten. Gluten acts as the structural framework of your pastry, ensuring it has the necessary strength. While all-purpose flour provides a delightful balance of flakiness and tenderness, bread flour, with its higher protein levels, yields a chewier texture that works particularly well for crafting exquisite croissants. When selecting flour, consider how each option can affect your dough:
- All-Purpose Flour: Versatile and provides a balanced outcome suitable for a broad range of pastries.
- Bread Flour: Contains high protein content, resulting in a chewier texture, making it ideal for croissants.
- Pastry Flour: Lower in protein, leading to a more tender dough, perfect for delicate pastries.
- Whole Wheat Flour: Adds a nutty flavour, but may necessitate adjustments in moisture levels for optimal results.
- Gluten-Free Flour: Specialized blends can be used, although they may yield different results and often require additional binding agents.
Grasping how flour selection impacts the texture and flavour of your pastries is crucial. Experimenting with different flours can unveil unique flavour profiles and textures, allowing your baked goods to become truly distinctive. Each flour type imparts its own character, so be intentional in your choices based on the specific pastry you aim to create.
How to Select Premium Butter for Perfect Lamination
The quality of butter you choose is pivotal in developing distinct layers within your laminated dough. It is critical to use high-quality butter with a fat content of at least 82% to ensure that your layers remain flaky and do not merge during baking. Furthermore, the moisture content in the butter can significantly impact your pastry’s final texture; excessive moisture may lead to a soggy product, while insufficient moisture can result in dryness. Here are some essential considerations when selecting butter:
- High Fat Content: Opt for butter with a minimum of 82% fat for optimal lamination results.
- Unsalted Butter: This allows for better control over the salt levels in your recipes, enhancing flavour precision.
- Cold Temperature: Ensure the butter remains chilled to prevent it from melting during the lamination process.
- Reputable Brands: Choose brands known for their high-quality dairy products to guarantee superior outcomes.
Using premium butter not only elevates the flavour but also enhances the overall texture and visual appeal of your pastries. The effectiveness of laminated dough greatly relies on the butter’s ability to generate steam during baking, expanding the layers and contributing to the desired flakiness.
How to Choose Yeast and Additives for Superior Dough Quality
The function of yeast as a leavening agent is critical because it enables the dough to rise and creates an airy texture in laminated pastries. The type of yeast you select can substantially affect your baking outcomes; fresh yeast provides a robust flavour, while instant yeast offers convenience and consistent results. Additionally, incorporating salt and sugar can enhance the flavour profile, adding richness and sweetness to your pastries. Keep in mind how the type and amount of yeast used will influence the dough’s rise and fermentation rate. Consider these crucial points:
- Fresh Yeast: Offers a rich flavour but has a shorter shelf life and requires careful handling.
- Active Dry Yeast: Must be activated in warm water before use, making it beginner-friendly.
- Instant Yeast: Can be mixed directly with dry ingredients, providing reliability and ease of use.
- Salt: Enhances flavour while reinforcing gluten, which is vital for structural integrity.
- Sugar: Contributes sweetness and aids in achieving browning during baking, enhancing overall appeal.
Selecting the right yeast and additives is essential for achieving the desired rise and flavour in your laminated dough. Each ingredient plays a significant role, and understanding their interactions can significantly improve your pastry-making skills.
How to Perfect Your Lamination Technique for Success

Step-by-Step Guidelines for Ideal Dough Preparation
The foundational stages of preparing your dough are crucial for effective lamination. Begin by mixing your chosen flour, yeast, salt, and water until a smooth dough forms. Allow this dough to rest sufficiently to ensure proper hydration and gluten development before proceeding with the lamination process. Here’s how to effectively prepare your dough:
- Measure Ingredients Accurately: Ensure precise measurements of flour, water, yeast, salt, and sugar to achieve optimal hydration and consistency.
- Mix Ingredients Thoroughly: Combine the dry ingredients first before adding water to ensure even distribution throughout the mixture.
- Knead the Dough Properly: Knead until the dough reaches a smooth, elastic texture, which typically takes about 8-10 minutes of vigorous work.
- Allow Dough to Rest: Let the dough rest for 30-60 minutes, covered to prevent it from drying out and to enable gluten relaxation.
This preparation phase is critical; it guarantees that your dough is adequately hydrated and ready for the lamination process. A well-rested dough will be easier to roll out and manage, ultimately leading to superior results in your finished pastries.
How to Incorporate Butter into Your Dough for Layering
Incorporating butter into your prepared dough is a vital step in crafting laminated dough. The objective is to encase the butter within the dough, guaranteeing that it is evenly distributed while remaining cold to maintain distinct layers. To achieve this, roll out your dough into a rectangle, place the butter on one half, and fold the other half over. Avoiding common mistakes made during this phase is crucial for the success of the lamination process. Here are key considerations to keep in mind:
- Temperature of the Butter: Ensure the butter is cold yet pliable; if it is too soft, it may ooze out during the lamination.
- Even Rolling: Apply consistent pressure while rolling to maintain a uniform thickness throughout the dough.
- Avoid Overworking the Dough: Handle the dough gently to prevent the butter from melting or blending into the dough.
- Seal the Edges Well: Ensure that the edges are tightly sealed to keep the butter contained during the lamination process.
By steering clear of these common pitfalls, you can create a well-laminated dough that yields the flaky layers you desire. Paying careful attention during the butter incorporation phase will set a solid foundation for the success of your pastries.
What Are the Different Folding Techniques for Layering Success?
The folding technique you select significantly impacts the layers in your laminated dough. Various methods, such as single, double, or letter folds, create differing layers of dough and butter, leading to varying textures in your pastries. Understanding how these techniques influence your final product is crucial.
For instance, a single fold produces fewer layers compared to a double fold, which effectively doubles the layer count with each fold. Here is a brief overview of how various folding techniques affect your pastries:
- Single Fold: Simple and effective for beginners, but generates fewer layers, resulting in less flakiness.
- Double Fold: Significantly increases the layer count, enhancing the flakiness of the pastry considerably.
- Letter Fold: Resembles a business envelope; this method is ideal for even layer distribution and uniformity.
- Book Fold: Similar to the letter fold but allows for more layers with less handling of the dough, thereby maintaining its integrity.
Experimenting with these techniques can yield varied results, enabling bakers to adjust their methods based on the desired textures and flakiness in their pastries. The choice of folding method directly influences both the structural integrity and overall flakiness of your final baked goods.
Why Is Resting and Chilling Dough Between Folds So Important?
Resting and chilling the dough between folds is fundamental to the lamination process. This essential step allows the gluten to relax, making the dough easier to roll out without tearing and preventing the butter from melting. Proper chilling helps maintain distinct layers, resulting in the flaky texture that characterises laminated pastries. Implement the following strategies for optimal results:
- Chill Between Folds: Allow the dough to rest for at least 30 minutes after each fold to help relax the gluten structure effectively.
- Use Plastic Wrap: Cover the dough to prevent it from drying out during resting periods, maintaining its moisture.
- Monitor Your Kitchen Temperature: Keep a cool environment to prevent the butter from melting during the lamination process.
- Establish Consistent Timing: Stick to a regular resting schedule to develop a routine that enhances your lamination technique.
Incorporating effective resting and chilling practices into your baking workflow will significantly improve the quality of your laminated dough. By allowing your dough the necessary time to relax, you ensure that the layers remain intact, resulting in beautifully flaky pastries.
Pro Tips for Mastering Laminated Dough for Pastries
How to Maintain Optimal Temperature Throughout the Lamination Process
Keeping the correct temperature throughout the lamination process is essential for ensuring success. Ideally, the dough should be at a cool room temperature, while the butter must remain firm yet pliable. The optimal temperature for dough is around 22-24°C (72-75°F), while the butter should be kept at 13-15°C (55-60°F). In professional kitchens, temperature control is often achieved through climate-controlled environments to ensure consistent results.
Utilising a marble countertop or a chilled rolling pin can assist in regulating temperature when rolling out the dough. Here are additional insights into effective temperature management:
- Use Chilled Tools: Employ chilled rolling pins and surfaces to enhance temperature control during the rolling process.
- Monitor Dough Temperature: Use an instant-read thermometer to accurately gauge the dough’s temperature for best results.
- Cool Environment: Take advantage of cooler times of day or a cool kitchen for optimal results in your baking efforts.
- Adjust Temperature as Needed: If the butter begins to soften, promptly return the dough to the refrigerator to restore its firmness.
By prioritising temperature management, you can avoid common issues such as butter leakage and dough sticking, ultimately leading to improved pastry quality.
How to Manage Rest Periods Effectively for Optimal Results
Rest periods are vital for allowing the dough to relax, preventing tearing, and ensuring even butter distribution throughout the dough. Effectively managing these resting periods can significantly influence the outcome of your lamination process. The general guideline is to allow the dough to rest for at least 30 minutes after each fold; however, this duration may vary depending on the dough’s consistency and the temperature of your working environment. Here’s how to manage resting periods effectively:
- Set Timers: Utilise timers to ensure consistent resting intervals between folds, promoting uniformity in your baking.
- Cover the Dough: Always cover your dough with plastic wrap or a damp cloth to prevent it from drying out during resting periods.
- Practice Patience: Avoid rushing the lamination process; resting is critical for optimal gluten relaxation and dough handling.
- Adjust Resting Time as Needed: If the dough feels tight, consider extending the resting period for improved results.
By adhering to these guidelines, you can ensure that your dough remains manageable and pliable throughout the lamination process, thereby enhancing the texture and appearance of your final product.
What Are Common Issues in Laminated Dough Preparation and How to Troubleshoot Them?
Even experienced bakers encounter challenges when working with laminated dough. Common issues such as butter leakage, uneven layers, or excessive toughness can arise. Effectively addressing these problems requires a comprehensive understanding of the lamination process. For example, butter leakage may occur if the butter is over-softened or if the dough is not sealed properly. Here’s how to troubleshoot common problems effectively:
- Butter Leakage: If you notice butter leaking, check the temperatures of both your dough and butter; they should be compatible to prevent issues.
- Uneven Layers: Ensure even rolling and consistent folding to maintain uniform layers throughout the dough.
- Tough Dough: Overworking the dough can lead to excessive gluten development; allow for adequate resting time to mitigate this issue.
- Dough Too Dry: If the dough feels dry, incorporate a little water during mixing to achieve the desired consistency.
Being proactive about potential issues not only saves time but also ensures that your final product meets the high standards of flaky, rich pastries that laminated dough promises.
How Does Laminated Dough Achieve Its Flakiness?
Understanding the Role of Steam in Creating Flakiness
Steam plays a crucial role in achieving the flaky texture characteristic of laminated dough. During the baking process, the water content in the butter evaporates, generating steam that expands between the layers of dough, resulting in light, airy pastries. The science behind this phenomenon centres on the formation of air pockets, which are essential for achieving that delightful flakiness. Here are some insights into how steam contributes to your pastries’ texture:
- Water Content: A higher moisture content in the butter produces more steam during baking, enhancing the flakiness of the finished product.
- Layer Separation: Steam effectively pushes layers apart, creating the desired flaky structure in the pastry.
- Baking Temperature: High initial temperatures facilitate quick steam production, setting the layers before they collapse.
- Type of Butter: The type of fat used can impact the amount of steam produced; for example, butter typically generates more steam than shortening.
Understanding the pivotal role of steam enables bakers to adjust their techniques to enhance the flakiness of their pastries, ensuring that every bite delivers the satisfying crunch and airy texture that is so sought after.
How Different Layering Techniques Enhance Flakiness
The quantity and quality of layers in laminated dough directly correlate with the flakiness of the end product. Various layering techniques will influence not just the texture but also the visual appeal of your pastries. For instance, executing a double fold exponentially increases the number of layers compared to a single fold. Here’s how different layering techniques can affect your final pastry’s texture:
- Single Fold: Simple to execute but results in fewer layers, reducing overall flakiness.
- Double Fold: Creates a significant increase in layers, leading to a much flakier product.
- Book Fold: Efficient for maintaining layers while facilitating easy handling of the dough.
- Letter Fold: Similar to the book fold, both methods yield multiple layers suitable for a variety of pastries.
Mastering these techniques empowers bakers to control their pastries’ texture, achieving the desired flakiness and visual appeal that captivates consumers.
What Is the Importance of Baking Temperatures in Achieving Flakiness?
Optimal baking temperatures are essential for creating the desired flakiness in laminated dough. A high initial temperature helps set the layers quickly, locking in the steam that contributes to the pastry’s rise. Generally, a temperature range of 200-220°C (390-425°F) is recommended for most laminated pastries. Consider these key points regarding baking temperatures:
- Preheat the Oven: Always ensure your oven is preheated to the proper temperature before placing your pastries inside.
- Utilise a Baking Stone: A baking stone can enhance results by ensuring even heat distribution, leading to uniform baking.
- Monitor Bake Time: Adjust baking times based on your specific oven characteristics; remember that every oven behaves differently.
- Aim for a Golden Brown Colour: A well-baked pastry should exhibit a golden brown, crisp exterior indicative of proper flakiness.
By understanding the critical role of baking temperatures, bakers can fine-tune their techniques to achieve that signature flaky crust, which is the hallmark of expertly crafted laminated pastries.
How to Select the Right Fat for Optimal Results in Baking
The type of fat used in your laminated dough plays a significant role in determining the flakiness and texture of the final product. While butter, known for its rich flavour and high fat content, is the traditional choice, alternatives such as shortening or margarine can also be used, though with varying results. Here’s how your choice of fat can impact your pastries:
- Butter: Provides rich flavour and generates steam during baking, leading to exceptional flakiness.
- Shortening: Produces a tender texture but lacks the flavour complexity found in butter.
- Margarine: Can serve as a suitable alternative, but may contain added water, which can affect flakiness.
- Fat Blends: Combining butter with shortening can strike a balance between flavour and texture, enhancing results.
Choosing the right fat is a crucial decision that influences both the taste and texture of your laminated pastries. Understanding the properties of each fat type will help you achieve your desired results with confidence.
Why Is Resting and Chilling Vital for Flaky Pastries?
Proper resting and chilling of dough are essential for achieving optimal flakiness in laminated pastries. These processes allow the gluten to relax and prevent the butter from melting during lamination. Resting periods typically last about 30 minutes between folds, although they may vary based on the dough’s condition. Here’s why these steps are vital:
- Relaxation of Gluten: Resting allows gluten to relax, making the dough easier to handle during subsequent folds.
- Maintaining Butter Firmness: Chilling helps keep the butter solid, ensuring that distinct layers remain intact throughout the process.
- Quality of Layers: Proper resting leads to well-defined layers, significantly contributing to the flakiness and texture of the final product.
- Effective Timing: Establishing a routine for resting periods can streamline the lamination process for improved efficiency.
Incorporating effective resting and chilling practices into your lamination workflow will enhance the quality of your pastries, ensuring they achieve the signature flakiness that makes laminated dough so desirable.
What Pastry Types Can Be Crafted Using Laminated Dough?
How to Create Classic Croissants from Laminated Dough
Croissants stand as a quintessential example of laminated dough, celebrated for their crescent shape and buttery layers. The key steps in shaping croissants involve rolling out the dough and cutting it into triangles. Each triangle is then rolled from the base to the tip, forming the iconic crescent shape. Here’s how to effectively shape croissants:
- Roll the Dough: Roll out to approximately 1/4 inch thickness, ensuring an even thickness throughout for optimal results.
- Cut Triangles: Cut the dough into equal-sized triangles, with a base of about 4-5 inches for consistency in size.
- Roll Tightly: Begin at the base and roll towards the tip, ensuring you do not stretch the dough excessively during this process.
- Shape the Ends: Curve the ends towards each other to achieve the classic crescent shape, ensuring a perfect finish.
Mastering the art of croissant shaping can significantly enhance the authenticity and quality of your pastries. The result should be beautifully layered, flaky croissants that embody the essence of French patisserie.
Exploring the Versatility of Danish Pastries
Danish pastries are renowned for their versatility, often filled with a wide array of sweet or savoury ingredients. They serve as the perfect canvas for creativity, showcasing the adaptability of laminated dough. The variety of fillings can greatly affect both the texture and overall flavour profile of the pastries. Here’s how different fillings can impact the texture of Danish pastries:
- Fruit Fillings: Juicy fillings may create a softer texture, so it’s essential to balance moisture levels to avoid sogginess in the final product.
- Cream Cheese: Rich fillings contribute to puffiness and tenderness, enhancing the overall sensory experience.
- Savory Fillings: Ingredients such as cheese or meat can add density, requiring careful balancing to maintain flakiness.
- Chocolate: High-quality chocolate fillings enhance richness; always choose premium chocolate for the best results.
Experimenting with various fillings not only diversifies your offerings but also allows you to develop unique flavour profiles that appeal to a broader audience. The versatility of Danish pastries makes them a favourite in patisseries around the world.
Puff Pastry: A Layered Delight for All Occasions
Puff pastry is distinguished by its multiple layers and versatility, making it suitable for both sweet and savoury dishes. Its unique lamination process sets it apart from other types of laminated dough, often requiring more folds to achieve the desired layer count. Understanding the distinctions between puff pastry and other laminated doughs is fundamental for any baker. Consider these key differences:
- Layer Count: Puff pastry generally requires more folds compared to croissant dough to achieve a higher number of layers, contributing to its characteristic texture.
- No Yeast: Unlike croissant dough, puff pastry is typically made without yeast, relying solely on steam for leavening, which creates its lightness.
- Texture: Puff pastry tends to be lighter and flakier due to its increased layer count, making it a favourite for various applications.
- Versatile Use Cases: Ideal for tarts, turnovers, and pies, offering endless culinary possibilities for bakers.
Understanding these key differences allows bakers to choose the appropriate dough for their specific needs, ensuring they achieve the right texture and flavour profile in their baked creations.
Kouign-Amann: A Unique Sweet Indulgence
Kouign-Amann is a delightful pastry from Brittany that showcases the richness of laminated dough through its caramelised sugar layers. Known for its rich, buttery flavour, it beautifully highlights the interplay between sweetness and flaky texture. The sugar within Kouign-Amann affects both texture and flavour; here’s how:
- Caramelisation: The sugar caramelises during baking, adding depth and complexity to the overall flavour profile, enhancing its appeal.
- Texture Variation: Sugar creates a slightly crunchy exterior, providing a contrast to the soft interior, enhancing the eating experience.
- Butter Balance: Ensuring the right butter-to-sugar ratio is key; too much sugar can lead to excessive sweetness and imbalance.
- Layering Influence: The method of incorporating sugar can affect layering; consider adding it between folds for added richness and flavour.
Kouign-Amann serves as a testament to the versatility of laminated dough and provides an exciting exploration of flavours and textures that resonate with pastry enthusiasts worldwide.
Pain au Chocolat: A Chocolate Lover’s Dream Come True
Pain au Chocolat features rich chocolate enveloped in layers of buttery laminated dough, offering a perfect balance between pastry and sweetness. Key steps in incorporating chocolate into the dough include selecting high-quality chocolate and ensuring even distribution throughout the dough. Here’s how to create the perfect Pain au Chocolat:
- Select Quality Chocolate: Choose dark chocolate to provide a rich, contrasting flavour that complements the pastry beautifully.
- Cut Chocolate Bars: Chop chocolate into small pieces to ensure even distribution within the pastry, enhancing the overall experience.
- Placement: Position the chocolate towards the centre of the rolled triangle before rolling it up to ensure even melting during baking.
- Seal Properly: Ensure the dough is well sealed around the chocolate to prevent leakage during baking, maintaining its integrity.
Mastering the technique of making Pain au Chocolat enables bakers to create a delightful treat that has captured hearts and taste buds globally. Each bite should reveal a harmonious blend of flaky pastry and rich chocolate, embodying the true essence of laminated dough.
What Benefits Does Laminated Dough Offer Bakers and Consumers?
How Does Laminated Dough Elevate Texture and Sensory Experience in Pastries?
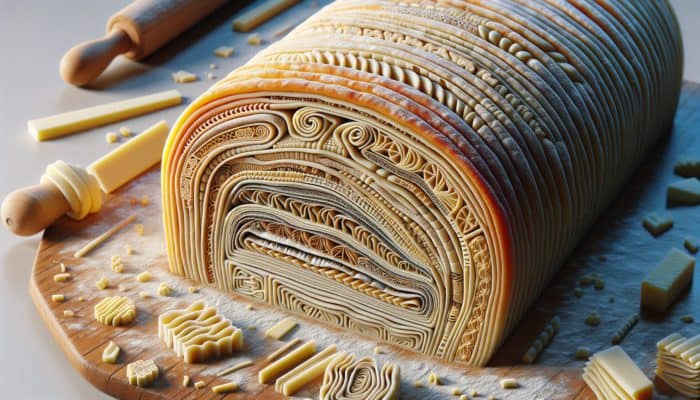
One of the primary advantages of using laminated dough lies in its unique texture, characterised by a delightful combination of flakiness and tenderness. This texture elevates the eating experience, distinguishing it from other types of dough. The layering process creates distinct air pockets, resulting in light, flaky pastries. Here’s how the texture of laminated dough compares to others:
- Flaky Layers: Each layer contributes to the overall flakiness, providing a satisfying crunch with each bite, enhancing enjoyment.
- Tender Crumb: The multiple layers create a tender crumb, ensuring a delightful mouthfeel that enhances the overall experience of consuming pastries.
- Aromatic Quality: The steam produced during baking increases aroma, making pastries even more appealing to consumers.
- Visual Appeal: Layered stratification creates an enticing appearance, making baked goods more visually attractive and marketable.
The exquisite texture of laminated dough not only enhances the sensory experience but also plays a crucial role in the overall enjoyment of pastries, solidifying their status as a favourite choice among consumers worldwide.
How Does the Versatility of Laminated Dough Enhance Baking Applications?
The versatility of laminated dough allows it to be utilised in a wide range of baked goods, spanning both sweet and savoury applications. This flexibility opens the door to endless possibilities for innovation and creativity in the kitchen. Here are some creative uses for laminated dough:
- Pastries: From croissants and Danish pastries to puff pastry tarts, the variety is extensive, appealing to various palates.
- Savory Dishes: Use laminated dough for quiches or filled pastries to provide a delightful texture and flavour combination.
- Sweet Treats: Incorporate a range of fillings, such as fruit, chocolate, or cream, to create unique desserts that captivate consumers.
- Appetizers: Puff pastry can be transformed into bite-sized appetizers, perfect for gatherings and events, enhancing culinary offerings.
The adaptability of laminated dough allows bakers to cater to diverse tastes and preferences, ensuring there is something for everyone. This versatility makes it a staple in both bakeries and home kitchens alike.
How to Enhance the Visual Appeal of Pastries Through Laminated Dough?
The distinct layers of laminated dough add significant visual appeal to baked goods, enhancing their attractiveness to consumers. The sight of beautifully layered pastries can entice customers and elevate the overall baking experience. Here are ways bakers can enhance the visual appeal of their laminated dough products:
- Glazes and Toppings: Use egg washes or sugar glazes to add shine and vibrant colour to your pastries, increasing their marketability.
- Innovative Shaping Techniques: Employ unique shapes or twists to make pastries stand out on display, attracting customers’ attention.
- Layer Visibility: Ensure layers are visible through careful rolling and shaping, highlighting the craftsmanship involved in creating high-quality pastries.
- Aesthetic Presentation: Serve pastries on attractive platters to enhance overall presentation and appeal, creating a memorable experience.
Focusing on the visual aspects of laminated pastries not only boosts their marketability but also creates an enjoyable experience for consumers, drawing them in for a closer look and a taste of your delicious creations.
What Is the Significance of Extended Shelf Life for Pastry Products Made with Laminated Dough?
Products made from laminated dough often benefit from an extended shelf life due to their unique structure. The layering technique helps retain moisture while preventing sogginess, keeping pastries fresher for longer. Here’s how this advantage benefits both bakers and consumers:
- Reduced Waste: A longer shelf life translates to less waste for bakers, maximising profitability and reducing costs.
- Consumer Convenience: Customers can enjoy pastries over an extended period without sacrificing quality, enhancing satisfaction.
- Storage Flexibility: Products can be stored without rapid spoilage, enhancing the overall buying experience and consumer trust.
- Quality Retention: The structure preserves flavour and texture, ensuring a satisfying eating experience for the consumer.
The extended shelf life of products made from laminated dough not only benefits bakers’ profitability but also enhances consumer satisfaction by delivering high-quality pastries over time.
What Are Effective Storage and Freezing Techniques for Laminated Dough?
How to Practice Best Short-Term Storage for Laminated Dough
Proper short-term storage is essential for maintaining the quality of laminated dough for several days. To ensure your dough remains fresh and usable, adhere to these best practices:
- Wrap Tightly: Use plastic wrap to tightly cover the dough, preventing air exposure and maintaining freshness throughout its storage life.
- Refrigerate: Store your dough in the refrigerator to keep it cool and workable for baking, ensuring optimal performance.
- Label and Date: Always label your dough with the date to remain aware of its freshness and usability.
- Keep Portions Small: Divide the dough into smaller portions for easier use and quicker cooling, making the baking process more efficient.
By implementing effective short-term storage techniques, bakers can prolong the shelf life of their laminated dough while ensuring high-quality results during baking.
What Are the Best Practices for Long-Term Freezing of Laminated Dough?
Freezing laminated dough allows for longer storage without compromising quality. Proper preparation before freezing is crucial to maintaining the dough’s integrity. Here’s how to prepare laminated dough for freezing effectively:
- Portion Control: Cut the dough into manageable portions to facilitate easier thawing and usage later on.
- Wrap Tightly: Use heavy-duty plastic wrap to seal each portion, preventing freezer burn and retaining quality during storage.
- Utilise Airtight Containers: Place wrapped dough in airtight containers or freezer bags for added protection against air exposure.
- Label and Date: Clearly label containers with names and dates for easy identification and tracking of stored dough.
Utilising these effective freezing techniques enables bakers to store laminated dough for extended periods while preserving its quality, flavour, and texture.
How to Properly Thaw and Utilize Frozen Laminated Dough for Baking?
Properly thawing frozen dough is crucial for maintaining its properties and ensuring optimal results. Here’s a step-by-step guide on how to effectively thaw and use frozen laminated dough:
- Transfer to Fridge: Move frozen dough to the refrigerator for an overnight thaw; this method helps maintain the dough’s structure for best results.
- Check for Softness: Ensure the dough is soft but not warm before rolling out; if it’s too firm, allow it to sit at room temperature for a while.
- Roll with Care: Roll out the dough gently once thawed to avoid tearing, using a delicate touch to maintain integrity.
- Shape and Bake: After rolling, shape the dough as directed and bake according to your recipe instructions for optimal outcomes.
By following these steps, bakers can ensure that their frozen laminated dough retains its quality and delivers excellent results once baked.
What Essential Tips Can Help Perfect Your Laminated Dough?
How to Ensure Consistent Rolling Techniques for Even Layers
Maintaining even pressure and thickness during the rolling process is crucial for achieving uniform layers in laminated dough. Inconsistent rolling can lead to uneven layers, negatively impacting the final product’s texture and quality. Here are the best tools and techniques for achieving consistent rolling:
- Quality Rolling Pin: Use a French or tapered rolling pin for better control over thickness and evenness.
- Guides for Thickness: Consider using pastry strips or a dough thickness guide to ensure uniformity throughout the dough.
- Rotate the Dough: Frequently rotate the dough while rolling to achieve even thickness on all sides, enhancing results.
- Work in Sections: Roll out manageable sections rather than the entire dough at once for greater control during the rolling process.
By focusing on consistency during the rolling process, bakers can ensure that their laminated dough achieves the desired texture and flakiness, resulting in superior pastries that delight the palate.
How to Cultivate Timing and Patience in the Lamination Process
Creating laminated dough requires time and patience, as rushing through the process can lead to less-than-optimal results. Cultivating patience is key to mastering the intricacies of laminated dough. Allow yourself the necessary time for each step to ensure high-quality pastries. Here are some tips for developing patience in the lamination process:
- Set a Structured Schedule: Establish a timeline for each step, including resting and chilling periods, to maintain progress.
- Enjoy the Creative Process: Embrace the artistry involved in making laminated dough and appreciate each stage as part of the baking journey.
- Practice Mindfulness: Focus on the task at hand and minimise distractions to enhance your overall experience and results.
- Accept Imperfections: Understand that not every batch will be perfect; use each attempt as a learning opportunity to improve.
By practicing patience and developing an appreciation for the process, bakers can achieve high-quality results and enjoy the art of creating beautiful laminated pastries.
How to Embrace Practice and Experimentation for Mastery?
Mastering laminated dough often requires a commitment to practice and experimentation with different techniques and recipes. Each attempt provides valuable learning experiences that can help refine your baking skills. Here are some common experiments bakers can try to improve their laminated dough:
- Varying Folding Techniques: Experiment with different folding methods to see how they affect the final product’s texture and flakiness.
- Testing Different Fat Types: Try using various fats (butter, shortening, etc.) to see how they impact flavour and texture in your pastries.
- Mixing Flour Blends: Combine different flours to explore their effects on dough elasticity and flavour profiles.
- Exploring Various Fillings: Test different sweet and savoury fillings to discover new and exciting combinations for your pastries.
By embracing a spirit of experimentation, bakers can unlock new flavours and textures in their laminated pastries, continually improving their craft and expanding their repertoire of delicious creations.
What Are the Frequently Asked Questions About Laminated Dough?
What is laminated dough?
Laminated dough is a type of pastry dough consisting of alternating layers of dough and butter, creating a flaky texture when baked. It is commonly used in various pastries, such as croissants and Danish pastries, renowned for their distinct layers.
Can I use margarine instead of butter in laminated dough?
While margarine can be utilised, it may not achieve the same richness and flakiness as high-fat butter. For the best results, opt for unsalted butter to maintain flavour integrity.
How do I know when my dough is ready to roll out?
The dough is ready to roll out when it is smooth, elastic, and has rested adequately to relax the gluten. It should feel pliable but cool to the touch, indicating it’s in the right condition for lamination.
How can I prevent butter leakage during baking?
Ensure that the butter is cold and well incorporated within the dough. Additionally, verify that the dough is sealed properly around the butter to prevent leakage during the baking process, maintaining the integrity of your pastries.
What is the difference between puff pastry and croissant dough?
Puff pastry is typically made without yeast and requires more folds for layering, while croissant dough uses yeast to help it rise and provides a different texture altogether, enhancing the flakiness.
How long can I freeze laminated dough?
Laminated dough can be frozen for up to three months. Ensure it is wrapped tightly to protect against freezer burn and to maintain quality during storage.
What temperature should my oven be for baking laminated pastries?
The ideal baking temperature for laminated pastries ranges from 200-220°C (390-425°F) to achieve a crisp, flaky texture that is characteristic of well-made pastries.
How do I know when my pastries are done baking?
Pastries are considered done when they are golden brown, crispy, and have risen significantly. The internal temperature should also be above 90°C (195°F) to indicate thorough cooking.
Can I use whole wheat flour for laminated dough?
Yes, whole wheat flour can be used; however, it may require adjustments in hydration and can yield a denser texture compared to all-purpose flour, affecting the final outcome.
Is it necessary to let the laminated dough rest between folds?
Absolutely, resting is essential for relaxing the gluten, making the dough easier to work with and helping maintain the integrity of the layers during the lamination process.
Check out our latest updates on our Facebook page!
The post How to Make Laminated Dough for Pastries: A Universal Guide appeared first on https://cookinggods.com.
The Article Laminated Dough for Pastries: Your Ultimate Guide Was Found On https://limitsofstrategy.com